Method overview:
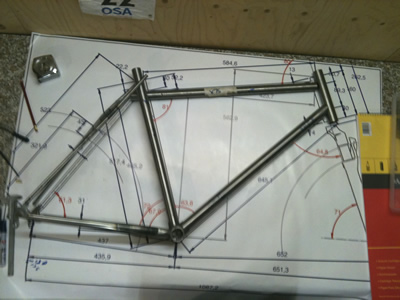
1. Drawing: Always work from a scale or full size drawing. This is easy these days as there are so many programs out there. I use “Rattlecad“ It’s free easy and accurate. I then get it printed at my local printers. You can hand draw as well if you have the time. Do not try and just jot a few numbers down and measure off a old bike. There are many things you need to measure and work out this really will save you time and make sure you make less mistakes.
2. Materials and tools: I will try and list some of the tools I am using in the gear section. As for materials there are loads of places to buy. I uses Ceeway in the and some local agents for 4310 or t45 tubing. You can design then choose your materials which is easier and they tube seller can help with selection or you can design around specific tubes. The advantage of brazing is that your can join dissimilar metals so 531 with 4310 and Nivachrome is no problem and you can use the same brazing rods.
3. Measuring: You will need to layout the tubeset on the drawing and start measuring up. this is where a drawing is really useful as you can notch and mitre the first end of the tube and then lay it down to measure where to cut next. If you have any doubts always cut a mm or two too long so that you can file to the exact length.
4. Cutting: I like to notch the tube first with this tool, then I will hand file to the exact fit. The mitre must be an almost exact match for the tube. You should see no daylight between the joint. You need less than a paper thickness of gap to achieve a strong joint. Not this is not welding where you can add filler material to the parent material to fill a gap. The tubes that the load and the braze keep them there (not quite as SIF 101 has 460MN/MM2n of UTS).
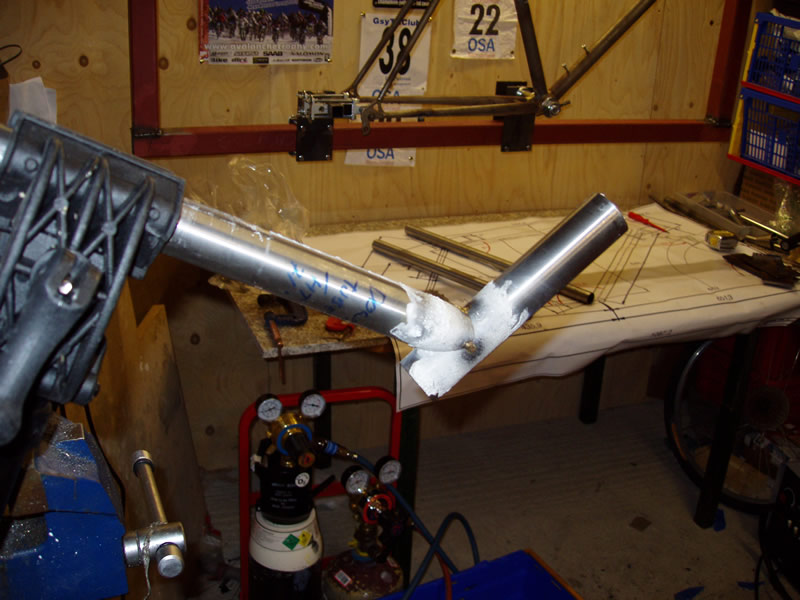
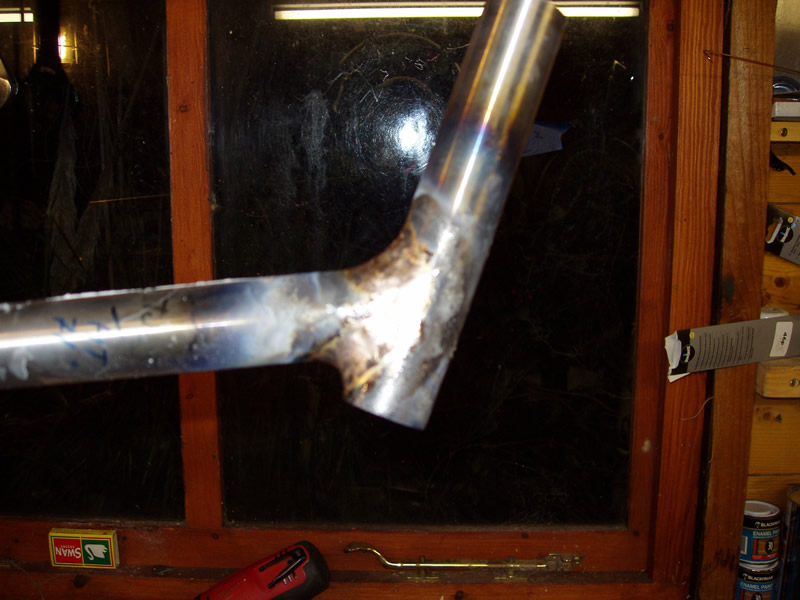
5. Brazing: There are two main types Capillary brazing which is used for lugged joints and lugless frames with out fillets such as late 80’s Peugeots and MKB’s. Then there is Fillet brazing (or Braze welding). Fillet brazing in industry is normally just a fillet laid down on the outside of a joint just as you would weld. For bike frames you kid of use both. You make a capillary braze first called wetting or tinning then you build a fillet over that. Note that you will get distortion caused by the fillet. As is heats up the whole joint expands, you add you filler that hot and when its contracts it pulls the joint angle tighter. So basically the area you are building up the angle will become less (i.e more acute). That’s why you will need to check the angle throughout the process.
6. Alignment: after you have done all your joints you will have to check the alignment in all planes. You can use a jig for this or a flat (ground) surface. You will need to check its all square and if its not you can tweak it a little with some “cold setting” gentle levering to pull it straight when it is cool. If your frame is 2mm+ out forget it this is for small tweaks.
7. Finishing: you will need to clean all the flux off and file all the fillets until they are smooth. Some people sand blast for stress (I am not convinced) but basically you will need to finish the frame off with sand paper and some manual effort.
8. Painting: er that’s kind of speaks for it’s self.
More details and pics to follow.
Proceedure:
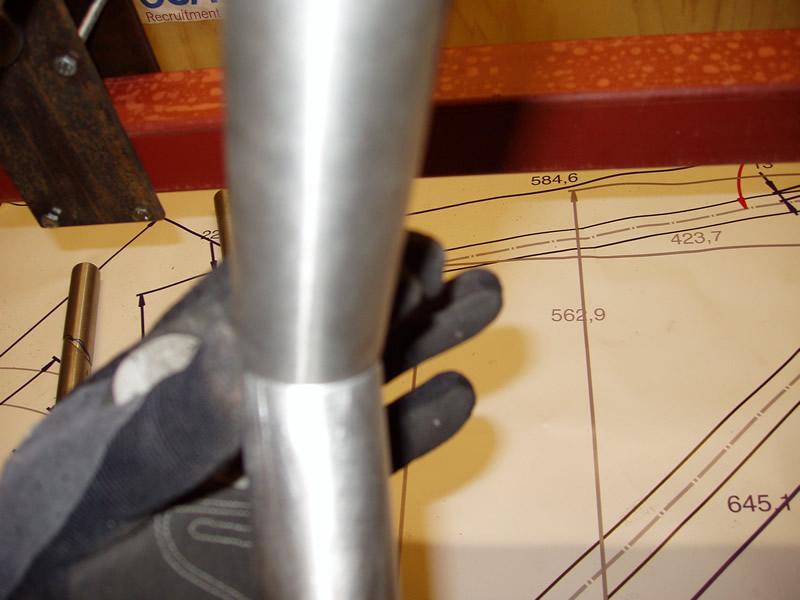
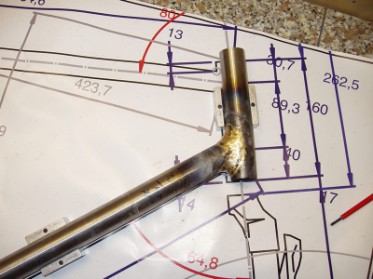
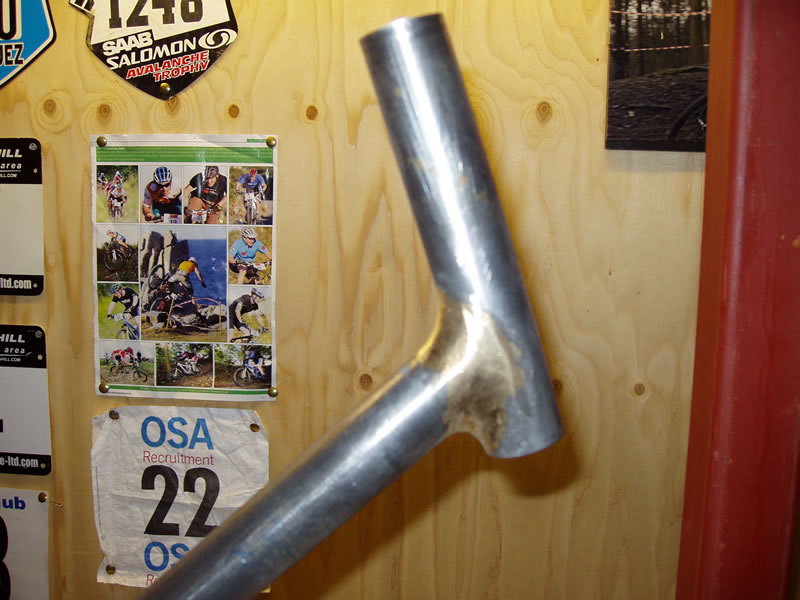
I like to start with the Head tube down tube join. Its the most important. Some builders start with the Seat tube Bottom bracket first, especially when doing a full fillet brazed build.
After the head tube I like to do the seat post bb joint. However before you can do this you need to prepare the seat post. I wanted to do a retro style reinforcement and a forward facing seat clamp.
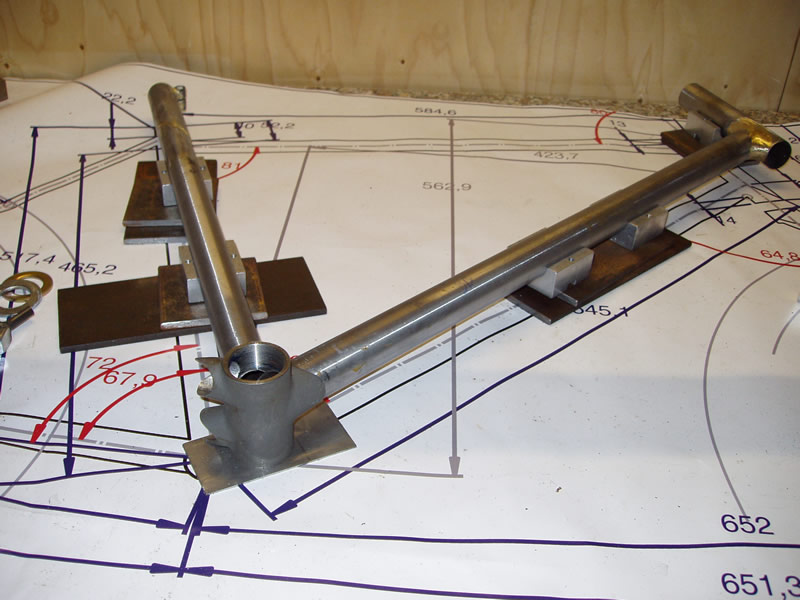
Normally if I was doing a fillet bottom bracket I would do that joint first then do the work on the other end of the seat tube. However this bike is going to have a Bottom bracket shell.
I got some 0.5mm tubing with a ID of 28.6 and cut it to shape by hand. I then lightly sanded the seat post and made sure this fitted correctly. It is tempting to make this a super tight fit but you need to make some space so that the brass can flow between them. So it should fit perfectly but slide off with no effort at all. For brazing of that you need to use a bigger tip again on a soft flame and heat the whole area. I like to add the brazing rod to the end facing the middle of the tube and use heat to pull the brass down to the open seat tube end. This way you can tell it’s come all the way down and it’s easy to clean up.
I also wanted a forward facing seat clamp. Which is find but you have to have to know which way is forward (so you need to have mitred the bottom bracket end). Also you have to braze the seat clamp on now and then cut your slot and drill the end of the slot to ensure it does not crack. Job done.
I would then normally start on the chainstay so I can then do the bottom bracket shell in one hit on a lugged build and on a lugless build I would do the front triangle first. this is kind of a bit of both but i will do the front triangle first.
I woudl normally start by tacking the bottom bracket to the seat tube, then tacking the down tube to the bottom bracket then the top tube to nmake the front triangle.
First things first lets get in on the bench to see if we can make it straight.